ACCKIP AP-SP Power Socket with Tasmota: Difference between revisions
No edit summary |
|||
| (19 intermediate revisions by the same user not shown) | |||
| Line 6: | Line 6: | ||
Price is about 12 USD, which is quite cheap. | Price is about 12 USD, which is quite cheap. | ||
* [https://de.aliexpress.com/item/4000316587977.html https://de.aliexpress.com/item/4000316587977.html] | * [https://de.aliexpress.com/item/4000316587977.html https://de.aliexpress.com/item/4000316587977.html] | ||
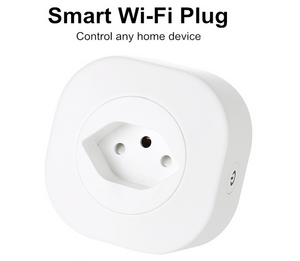
[[File:ap-sp.png|300px]]<br> | |||
=Flashing= | =Flashing= | ||
| Line 11: | Line 12: | ||
* [https://tasmota.github.io/docs/ Tasmota Homepage] | * [https://tasmota.github.io/docs/ Tasmota Homepage] | ||
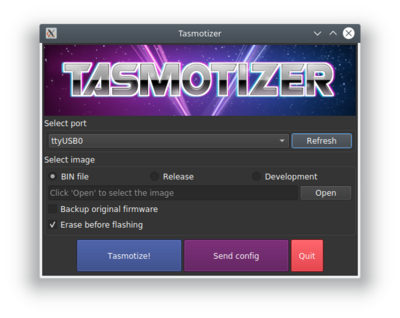
Tasmotizer is a all-in-one flasher which can flash esp-8266 based iot devices out of the box | |||
* [https://github.com/tasmota/tasmotizer Tasmotizer Homepage] | |||
[[File:Tasmotizer.png|400px]] | |||
Of course you need some basic soldering skills and few dupont lines to get it running.<br> | |||
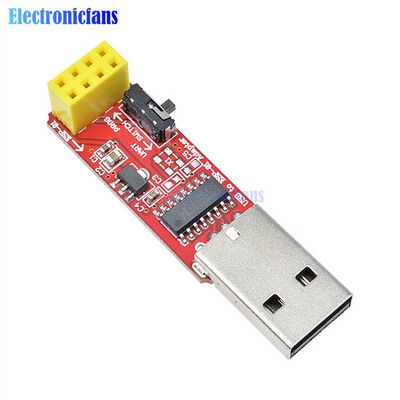
For flashing, I used the tool I have for flashing ESP-01 modules, it worked as expected.<br> | |||
Of course you can use any FTDI if it supports 3.3V logic level. | |||
* [https://de.aliexpress.com/item/32971337222.html CH340 USB to ESP8266 Serial ESP-01 ESP-01S ESP01 ESP01S Wireless Wifi Developent Board Module for Arduino Programmer Adapter] | |||
[[File:esp01-flasher.jpg|400px]] | |||
=Soldering= | |||
To get the firmware into the ESP, just solder one end of the dupont lines into the esp temporarily, once firmware is flashed, you can update it over the air later on.<br> | |||
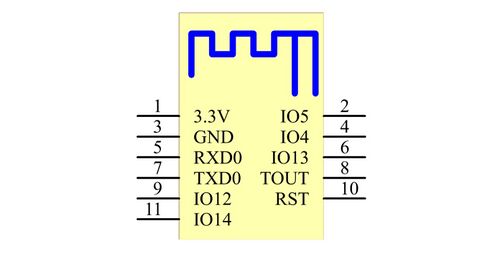
If you open the power socket, you can find the TWE2S chipset from Tuya which is mainly an ESP8266EX. | |||
* [https://docs.tuya.com/en/iot/device-development/module/wifi-module/wifie2smodule?id=K9605u79tgxug TWE2S Homepage] | |||
<hr> | |||
[[File:twe2s-pinout.jpeg|500px]]<br> | |||
<hr> | |||
[[File:twe2s-socket.png|500px]]<br> | |||
<hr> | |||
[[File:esp-01-ftdi.jpeg|800px]]<br> | |||
<hr> | |||
=Configuration= | |||
Once you successfully flashed the powersocket before dying by a electro shock, you will see the tasmotoas firmware boot an accesspoint.<br> | |||
Then you can log into the webinterface of IP 192.168.4.1 as described on the Tasmota hompeage.<br> | |||
After you fed the credentials of your WiFi connection, you can log into the tasmota webinterface and configure the firmware so, that it is working with all the features.<br> | |||
For that go to: CONFIGURATION > CONFIGURE TEMPLATE and configure as shown below:<br> | |||
[[File:tasmotas-ap-sp.png|300px]]<br> | |||
It is important to configure the IOs exactly as given, but once done, you have a fully opensource software based powersocket with all the features of tasmota supported by your hardware.<br> | |||
[[File:tasmotas-ap-sp-ui.png]] | |||
* Wifi UI for controlling the powersocket | |||
* URL Power Switch Triggers | |||
* PowerConsumption counter | |||
* Scheduled powerswitch | |||
* MQTT client | |||
* Syslog client | |||
* Domoticz Support | |||
* many more .... | |||
[[Category:Hacking]] | [[Category:Hacking]] | ||
[[Category:IoT]] | [[Category:IoT]] | ||
Latest revision as of 17:46, 6 July 2020
General
This is a short note about my ACCKIP AP-SPI WiFi powersocket hack to get it running with Tasmota.
Buy
This is one of the WiFi power sockets that you can buy with swiss connectors.
Price is about 12 USD, which is quite cheap.
Flashing
I tried out the Tasmota Firmware which is doing an amazing job once it is running.
Tasmotizer is a all-in-one flasher which can flash esp-8266 based iot devices out of the box
Of course you need some basic soldering skills and few dupont lines to get it running.
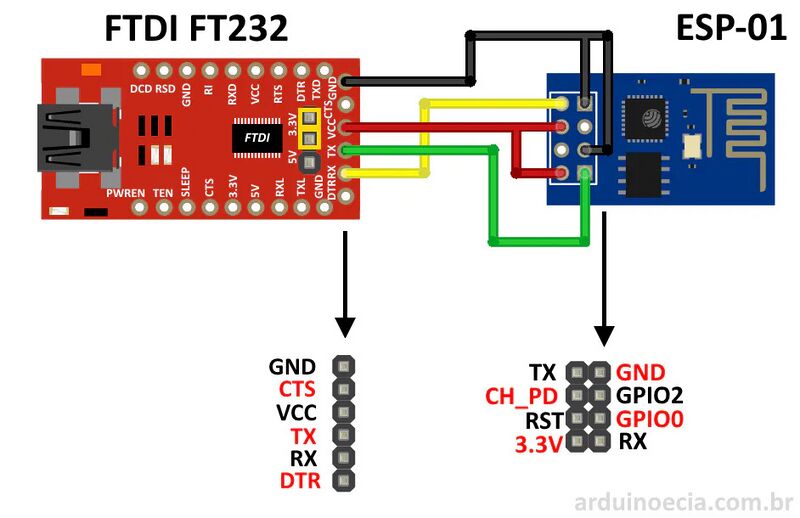
For flashing, I used the tool I have for flashing ESP-01 modules, it worked as expected.
Of course you can use any FTDI if it supports 3.3V logic level.
Soldering
To get the firmware into the ESP, just solder one end of the dupont lines into the esp temporarily, once firmware is flashed, you can update it over the air later on.
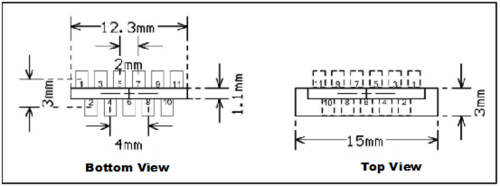
If you open the power socket, you can find the TWE2S chipset from Tuya which is mainly an ESP8266EX.
Configuration
Once you successfully flashed the powersocket before dying by a electro shock, you will see the tasmotoas firmware boot an accesspoint.
Then you can log into the webinterface of IP 192.168.4.1 as described on the Tasmota hompeage.
After you fed the credentials of your WiFi connection, you can log into the tasmota webinterface and configure the firmware so, that it is working with all the features.
For that go to: CONFIGURATION > CONFIGURE TEMPLATE and configure as shown below:
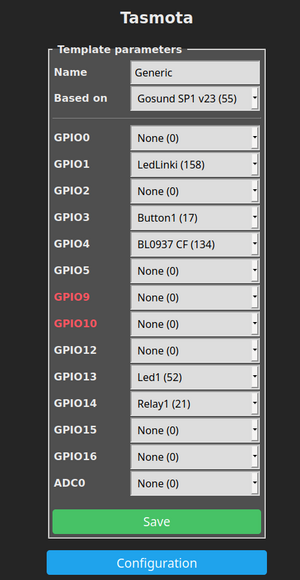
It is important to configure the IOs exactly as given, but once done, you have a fully opensource software based powersocket with all the features of tasmota supported by your hardware.
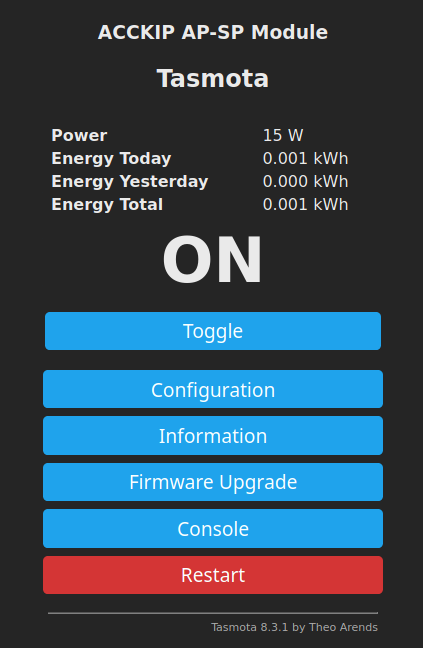
- Wifi UI for controlling the powersocket
- URL Power Switch Triggers
- PowerConsumption counter
- Scheduled powerswitch
- MQTT client
- Syslog client
- Domoticz Support
- many more ....
